So ski season is coming to a close, and for those that have a Thule cargo box or a Yakima ski carrier that usually means it's time to remove it from your car and find a good storage place for the cargo box in your garage. In the first year or two of getting my Thule ski cargo box, I would just remove the Thule box from my car and leave it on top of stacked up winter car tires and an extra garbage can in my garage. But after adding a workbench, and compiling more stuff, this was no longer an option if I wanted to have more room to move around and work on things in my garage. So I decided to purchase a RAD Bike Lift Hoist and convert it so that it would hold up my Thule box hanging from the garage ceiling. This cargo box garage ceiling pulley system that I put together can be built for under $30. If you don't want to build your own, Thule does actually sell their own Thule MultiLift system, but it will cost you a lot more at around $200.
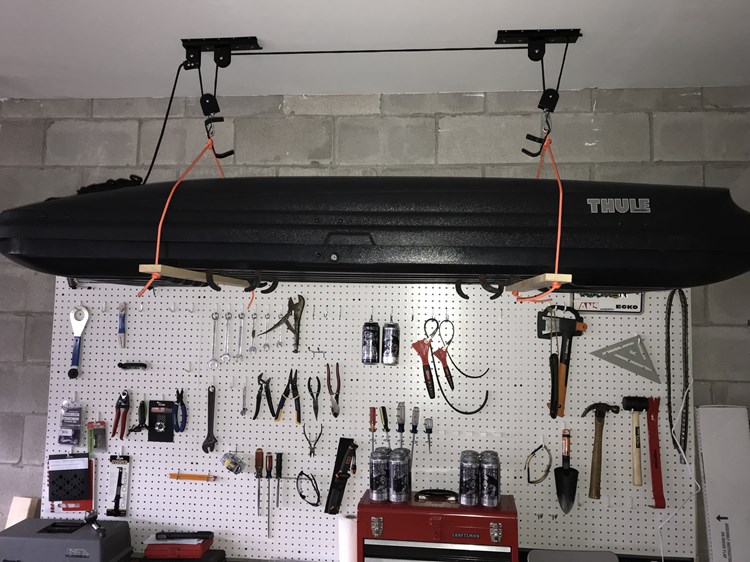
A couple things to note before you build your own cargo box hoist; my garage ceiling is 9ft tall... I installed this Thule Box storage lift directly over my workbench and at a height of 6' 2" I still have at least 6" of head room above me, so my Thule cargo box does not get in the way when I'm standing directly underneath it. In addition to hanging up a Thule box or Yakima ski cargo box, this DIY lift hoist could also be used to store a canoe or kayak for the winter, but you'd just want to space out the two pulley's farther away from each other due to the longer length of canoes/kayaks. Keep in mind, RAD does make a specific Kayak Hoist (or StoreYourBoard Ceiling Storage Hoist) that uses straps to hold up the kakak, but when it comes to Cargo boxes and canoes I think it's much better to have a solid platform (in this case wood) for the cargo box to rest on, so the plastic cargo box doesn't get deformed while it's hanging, which would then make it harder to open and close the box. So with that in mind, here are the materials and steps to take if you want to build your own pulley lift system to hold up your cargo box in your garage.
Here are the materials you need to build the DIY Cargo Box Garage Ceiling Pulley Lift
Here's how-to setup the DIY Thule Cargo Box Garage Ceiling Pulley Lift
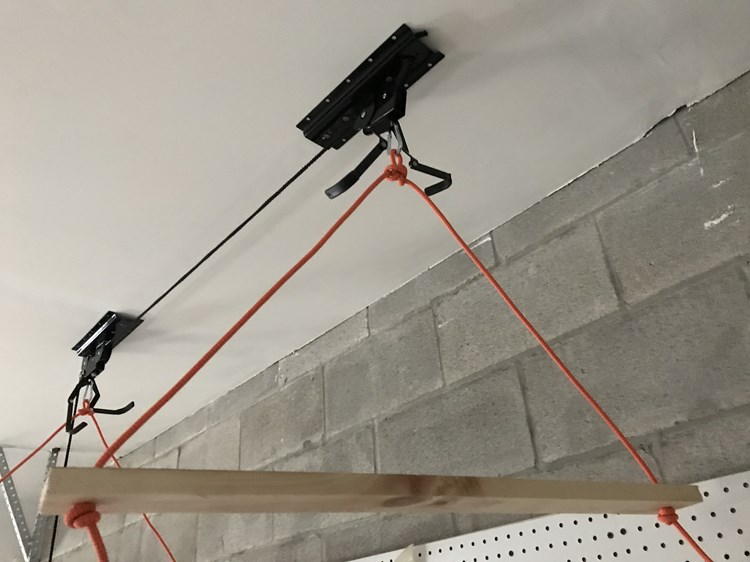
1) Follow the directions of the Rad Bike Lift to install it on your Garage ceiling. Note: My garage ceiling joists ran in the same direction that I wanted my Thule Box to run lengthwise, so I was able to screw the Rad Bike Lift directly into the ceiling joists using a total of 8 screws. In order to mount it perpendicular to the joists, you'll first need to mount a 2"x6" board perpendicular onto the ceiling joists using use 4" Lag screws, so it doesn't fall down. Then you would mount the Rad Bike Lift onto the 2"x6" board.
2) Now attach the carabiners to each Rad Bike Lift hook (Note: there's a hole in the middle of each hook that a carabiner can clip onto).
3) Next cut two pieces of the 3" wide pine board approximately 28" long. You may want to cut the length wider or shorter, depending on how wide your Thule or Yakima cargo box measures. Just make sure the boards are wide enough, so that the rope that will be holding up the cargo box doesn't squeeze or pinch the sides of the cargo box, which could potentially deform the plastic of your cargo carrier. This is why I decided to use the two pieces of wood as the bottom support to hold up my Thule box, and not use a strap or rope all the way around my cargo box. Note: you could use a 2x4, instead of 3"x1" pine board.
4) Now on both ends of the two pieces of wood, drill holes for the 6mm Accessory Cord Rope to just barely squeeze through. The holes should be drilled at least 1" from the either end of the wood.
5) Cut two pieces of 6mm Accessory Cord Rope (approx. 8ft to 10ft in length each, to give you enough rope to play around with when determining the appropriate length of rope to fit around your Cargo box after knots are tied. Use a lighter to burn the ends of the rope that you just cut, so the ends of the rope do not fray and can be easily be pushed through the holes in the Pine board.
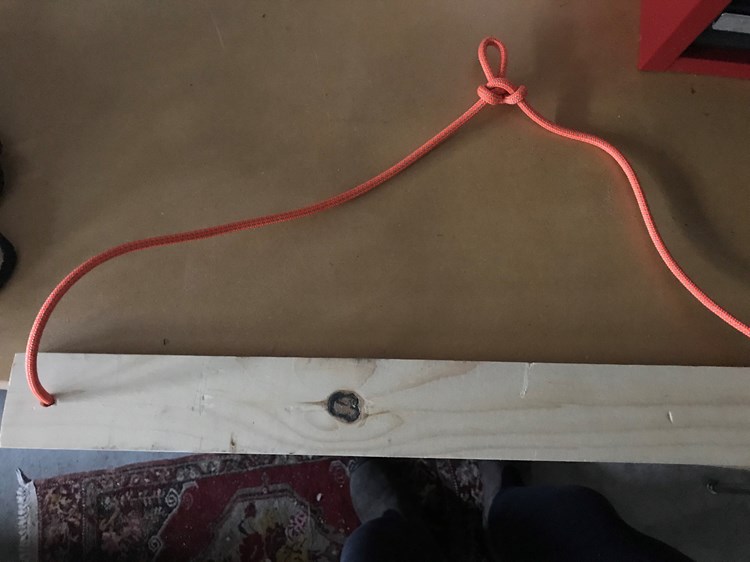
6) Now thread one end of rope through one of the holes you just drilled, and then tie off the end of the rope using a Double Overhand knot, so the rope does not slip back through the hole (you may also just use a single overhand knot). If you don't know how to tie a Double Overhand knot, the Knots 3D app is a really handy knots app for you iphone to use for reference when tying knots. See the picture below of what a Double Overhand knot looks like on the underside of the 3" pine board:
7) Then thread the other end of the rope through the opposite hole in the Pine board. Give yourself enough slack in the rope so it will fit around your Thule box. Now tie this end off using a Double Overhand knot.
8) In the middle of the rope tie an Alpine Butterfly knot. Again, if you don't know how to tie an Alpine Butterfly knot (it's pretty easy to learn), just get the Knots 3D app or watch this video. This knot will be used to clip onto the carabiner and hold up your Thule / Yakima box. If you don't use a knot in the middle of the rope, the rope will slip around and the Cargo box will much more easily flip on its side, when you are using the pulley system to hoist up the box. See below for what an Alpine Butterfly knot looks like in the middle of the rope:
Keep in mind, getting the rope length correct and the Alpine Butterfly knot in the exact middle of the rope, will take a little bit of trial and error to get things just right for your particular Cargo carrier. So that's why it's a good idea to start with a long enough rope, and then once you've got the Double Overhand knots and the Alpine Butterfly knot tied at the correct spots, you can always cut the end of the rope a second time to shorten any long rope tails.
9) Once you've got the rope setup correct for your Thule/ Yakima box and the knots tied for both pieces of wood, put the two ropes and wood platforms around your Cargo ski box.
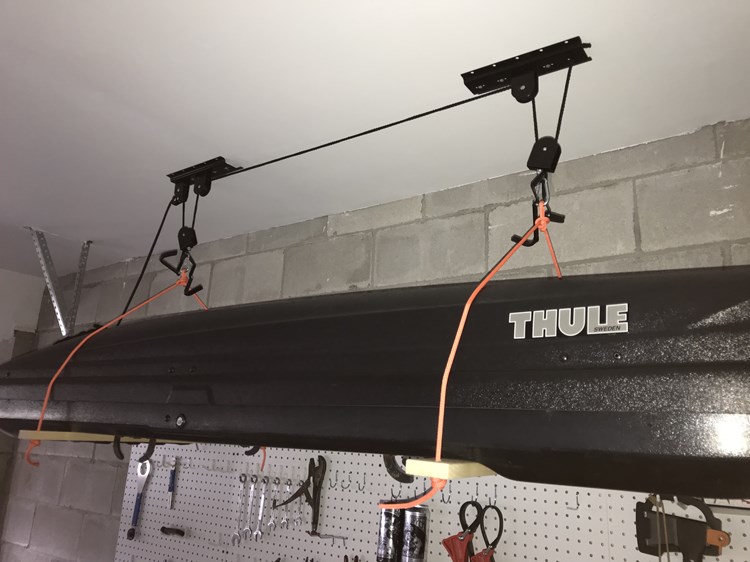
10) Now just attach the carabiners to each of the Alpine Butterfly knots bight, and use the Rad Bike lift pulley system to hoist up your cargo carrier to the ceiling. Note: When using the pulley system to hoist up your cargo box, you may need to push up and straighten out either end of your Thule cargo box, if one end of the rope pulleys gets uneven (i.e. one side lower or higher than the other pulley) as you are hoisting up the box.
11) Once you've got the Cargo box hoisted up and positioned where you want, be sure to tie the pulley rope to the wall (or solid object) so the hoist does not accidental release and drop the cargo box to the floor (or on your head or car). This is something I still need to do... as I just put the excess pulley rope on top of my Thule box (which is not the safest, I know).
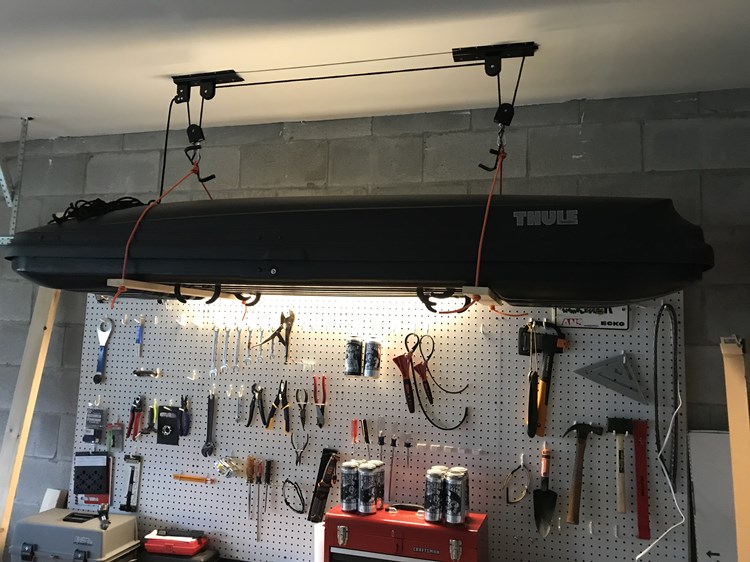
Thule box hanging from the garage ceiling above workbench.
That's it!