I recently bought my first mountain bike after 20 years of basically not riding a bike (I spent most of my teen years riding BMX, dirt jumping and street riding). I wanted a solid, simple and cheap bike rack I could use in my garage to keep my mountain bike stored in when I wasn't using it, and also for quickly off-loading the bike from my car after a ride. Additionally, I also wanted a bike stand that I could use to work on the bike. So I decided to build a bike rack / stand combo using a few left over 2x6 and 2x4 boards I had lying around, and some screws and angle braces from Home Depot. I also picked up an inexpensive Bike Repair Stand from amazon that I mounted to the top of the bike rack that has worked really well and allows me to easily work on my bike in my garage without taking up any extra space.
As a bonus this bike rack can also be used as a Manual balance machine for practicing manuals, just by unscrewing the repair stand from the top of the rack. As explained at the end of the post below.
One thing to keep in mind is that this bike rack was built initially to fit my 27.5 inch mountain bike with 2.2 Wolverine tires. If you have a different sized bike wheels and /or tires, you'll need to size your bike rack a little differently to fit your bike tires.
After I built the rack, I decided to put on a larger volume 2.35 front tire on my bike, and luckily it just fit in the rack because I had initially left some room for the front tire to fit in-between the boards of the rack. However, in the future if I decide to put an even larger tire on my bike, I'd have to make some adjustments to the rack to fit a wider tire. So if you think you may put a larger sized tire on your bike in the future, just be conscience of that and leave plenty of room for a larger tire to fit in between the rack. I think I left about a quarter inch of extra space when I initially built the rack, but probably would have been better off if I had left a half inch of extra space for the tire to fit in so the rack could accommodate a larger front tire if needed.
Here are the parts to Build DIY Bike Rack Stand:
Here are the tools you'll want to have:
Here are the steps to build a DIY Mountain Bike Rack with an attached Repair Stand:
1) Measure and cut the 2x4's for the base of the rack (Length cut: 18" back 2x4 base, 14" front 2x4 base)

Measurement of the back base 2x4 for the back of bike stand cut to a length of 18" inches.
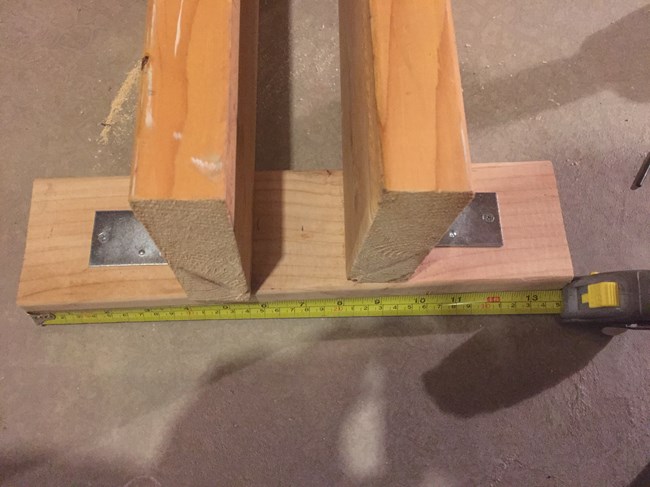
Measurement of the front base 2x4, cut to a shorter length of 14" inches.
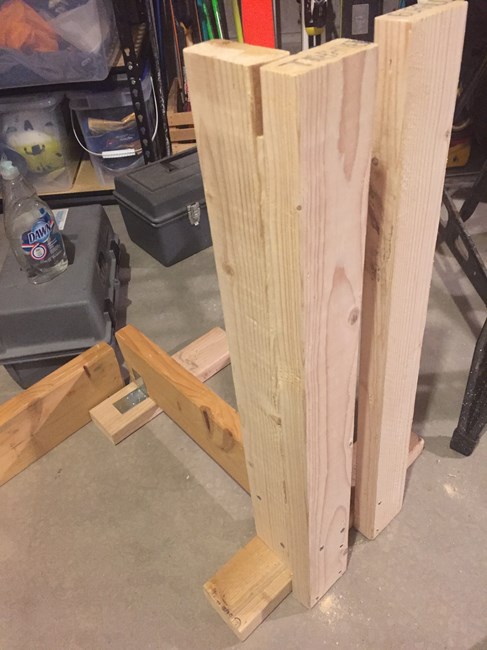
2) Measure and cut 2x6's for lower sides of stand
Cut two 2x6's at a length of 21" inches. NOTE: If you're planning placing the rear wheel in the rack, you'll be better off using 2x4's instead of 2x6's because a bikes rear derailleur may hit the top of 2x6... see picture at end of post.
3) Now determine the front tire spacing width to use for the stand to fit your bikes front tire, at a minimum leave a 1/4" of extra spacing. Leave more space if you expect to get a larger/wider volume tire in the future.
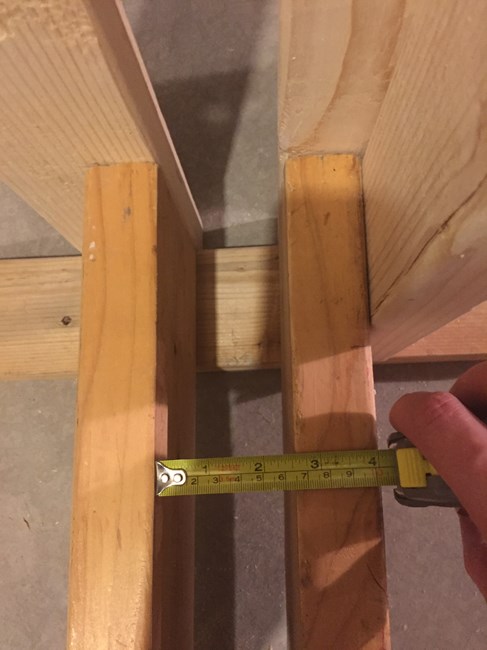
I made the Front tire spacing width 2 3/4" inches to fit a 2.2 front tire originally. But I probably should have made this at least 3" to account for wider tires, which I've since upgraded my bike to use. I can now just barely squeeze in a Schwalbe Hans Dampf 2.35-inch front tire, which I upgraded to after I built the stand.
4) Measure and cut the 2 longest 2x4's that will hold the front tire in the vertical position. (Length cut: 30 1/4" inches). Then measure and cut the 2 vertical adjacent 2x4's (Length cut: 28 1/2" inches)
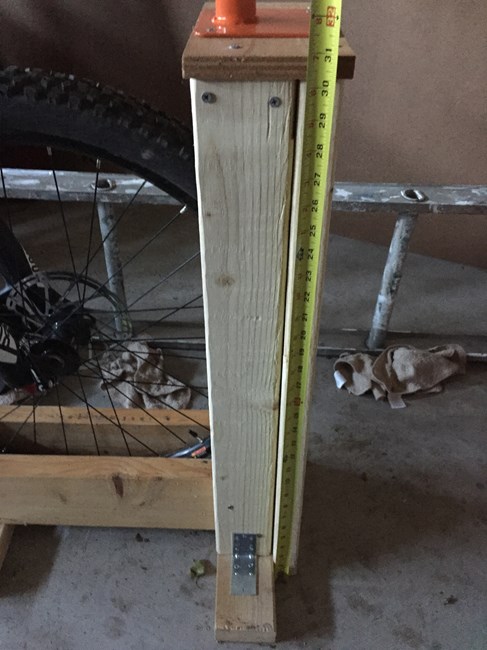
Height of the two longest 2x4's is 30 1/4" inches. The height of the adjacent vertical 2x4's is 28 1/2" inches.
5) Use only 2 of the Double-wide corner braces and attach the 2x6's to the center of the front bottom 2x4 base board. Make sure the 2x6's are spaced appropriately to accommodate your front wheel.
6) Then use of the Grip-Rite Primeguard 2 1/2" exterior screws to attach the 2 longest 2x4's to the bottom of the 18" bottom base 2x4. Then screw the long 2x4's into the back of the 2x6's. Make sure both the 2x6's and the longest vertical 2x4's are spaced appropriately to accommodate your front wheel width.
Assemblying the bike rack.
7) Make sure to attach the two (28 1/2") vertical 2x4's to the sides of the 2x6's and also screw them into the longer vertical 2x4's from top to bottom, so that the vertical 2x4's are solidly attached. Also use the last two Double-wide corner braces and attach the (28 1/2") vertical 2x4's to the bottom back 2x4 base board.
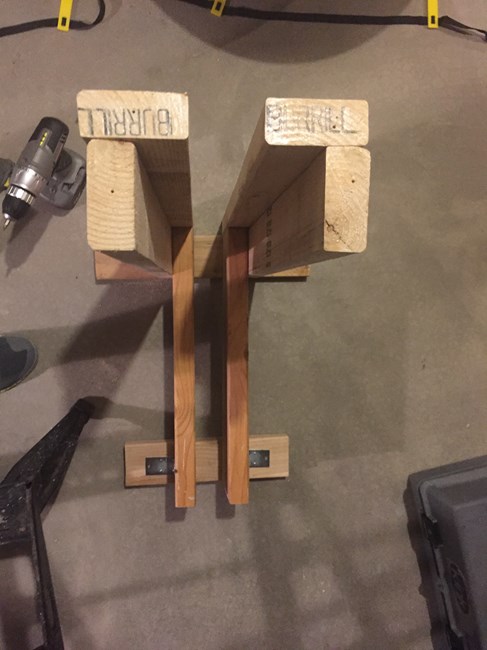
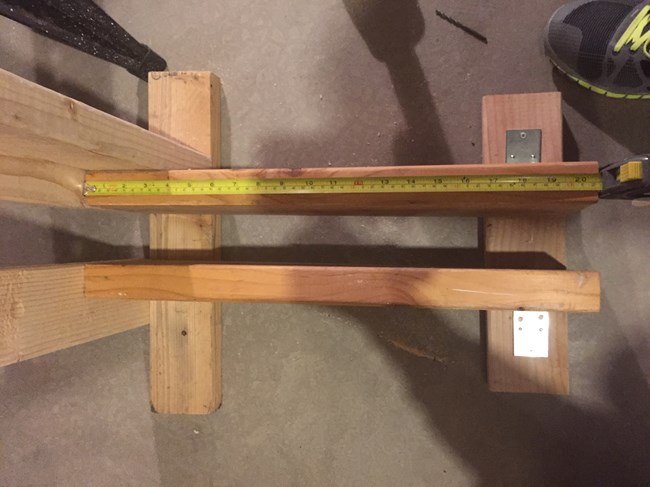
Top view before adding last 2x4 top brace and 3/4 inch plywood to the top.
7) Measure and cut a short 2x4 to use as the cross brace at the top of the rack. In this case, the 2x4 was cut to a measurement of 6 1/8" inches. Then attach this 2x4 brace, horizontally at the top of the vertical 2x4's.
8) Now cut a small piece of 3/4 inch plywood (9 1/2" x 5 1/2") to attach to the top of the rack. This will make a solid platform for the Conquer Bench Mount Bike Repair Stand to get mounted on.
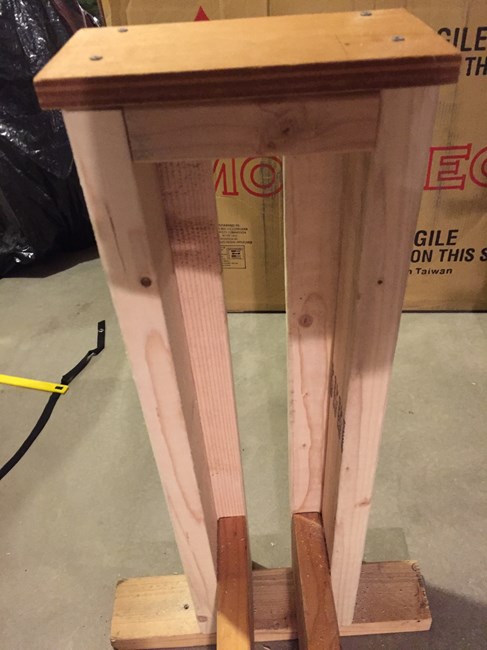
Top and front view before mounting the Conquer Bench Repair Stand.
8) Now use two of the 1 1/2 inch shorter exterior screw to screw in the front two holes of the Conquer Bench Mount Bike Repair Stand to the top of the stand. You can then use two 2 1/2 inch screws to screw in the back two holes of the stand. NOTE: The reason you needed to use two shorter screws for attaching the front two holes was of theConquer repair stand is that the 2 1/2 inch screws will poke through the bottom of the cross braced 2x4, which could potentially puncture a tire.
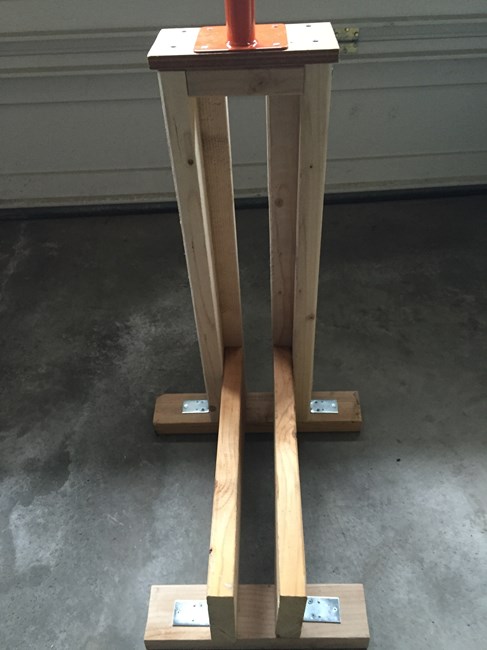
Front view after mounting the Conquer Bench Repair Stand.
9) That's it! Here's the finished DIY Bike Rack and Repair stand.
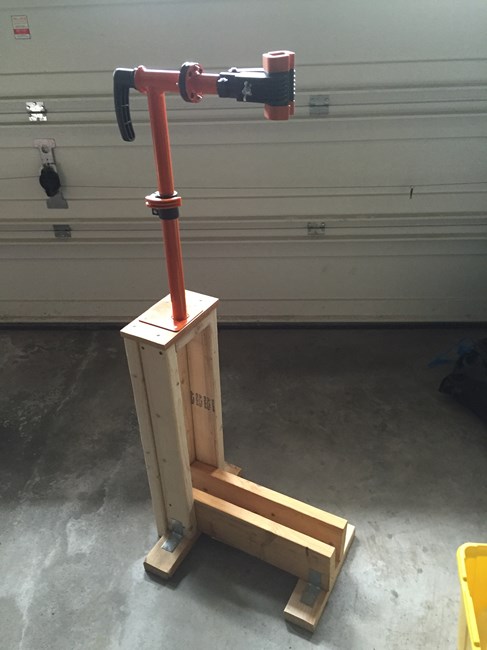
View of Finished DIY Bike Rack and Stand.

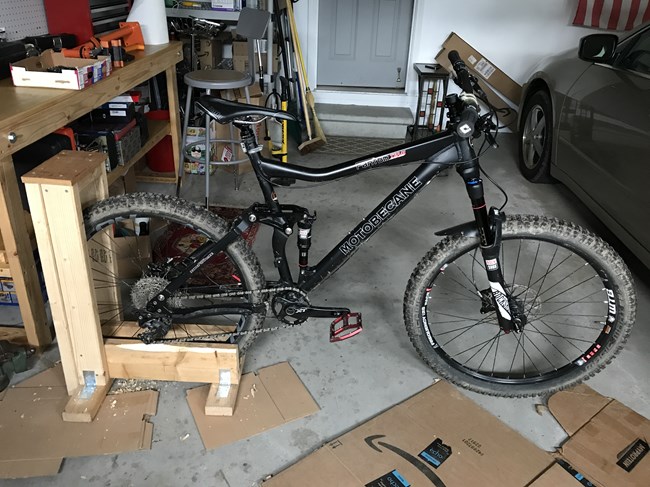
DIY Bike Rack and Stand holding front wheel of bike.
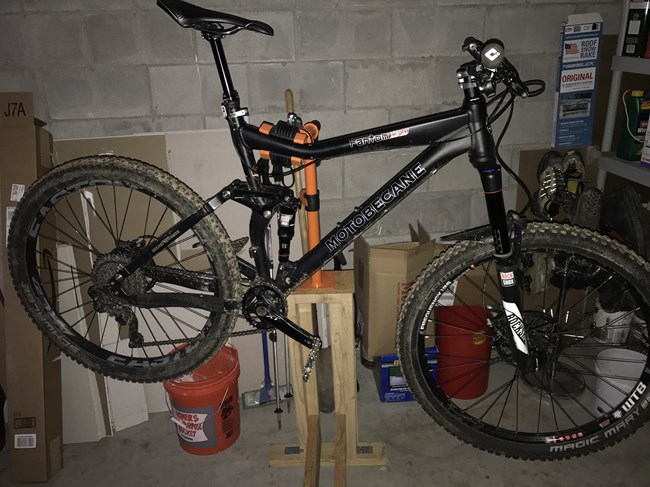
Conquer Bench Mount Bicycle Repair Stand holding up mountain bike on DIY bike rack/stand.
To see the full gallery of pictures of this DIY Bike Rack and Repair Stand - Click Here.
BONUS Update 7/23/2017: So as a bonus this bike rack can also work as Manual balance machine for learning how-to manual or practicing your manual balance point. I got the idea for this from the following video Making of The Manual Machine. All you would need to do is unscrew the repair stand from the top of the rack. The top of the rack then acts as a bailout fallback seat, if you tip too far back while trying to manual (which actually works surprisingly well). With that said, since I used 2x6's for the rack, when putting the rear wheel in the rack, I needed to shift into the highest gear, so the rear derailleur would fit better. I also needed to cut away some of the wood on the left side so the derailleur would not hit the 2x6. So essentially, I probably would have been better off using 2x4's instead of 2x6's.
A couple other things I might have done differently is use two longer base 2x4's to make the rack more stable when using it for manual practice. If I was shorter I might also make the height of the rack 1" (maybe 2") lower, so the top of the rack is closer to the rear wheel, so you can get your bum lower to rear wheel without hitting the rack. I didn't plan to use the rack for manual practice when I initially built this rack/stand, but it turns out that it works pretty well as is for me at 6' 2" tall. Lastly, my bikes 2.35 Hans Dampf rear tire fits very snuggly in the rack, so I'm not sure how well this would work for manuals if the tire fit loosely. If that were the case you could add a backstop to the back bottom or top of the rack, so the tire still touched the ground and went through the back of the rack, but would not go too far back when practicing manuals. In my case, my bike tire has never moved past the rear 2x4 that is on the ground, so that seems to be enough of a back stop as I need for the rear tire. Nor has the rack ever tipped over backwards, but it would be easy enough to add some stabilizers to the back of the rack if needed.
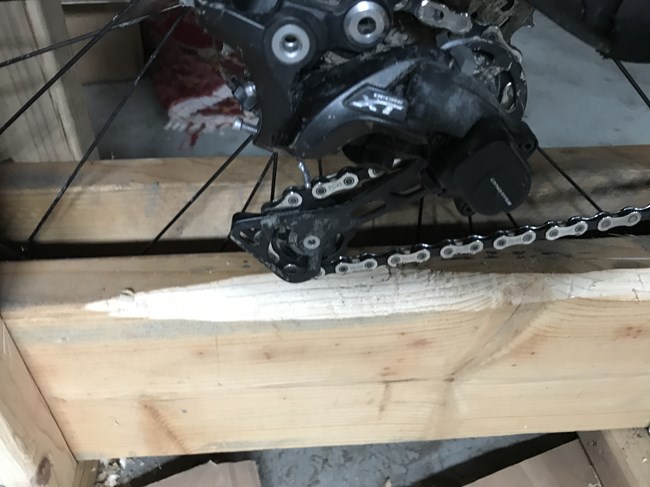
Wood chopped away from the 2x6 to fit the Rear Derailleur in the highest gear. (Not optimal, but it works to give just enough clearance).